Friday, January 31, 2014

Quinoa/Kale Salad


It's only 1:39 and I have had such a productive day! I got a new job (yay!), and start Monday. So I have today to take a bit of a breather, and did some food shopping at Everything Natural as well as the regular grocery store. I've made a beautiful lunch, and have a lovely dinner planned! First things, first, this is what you can toss together if you have about 30-40 minutes on your hands! 

I've decided that I need to take photos of the process rather than just the end product. This particular salad is inspired by tabbouleh. It began as version of the Arabic dish using quinoa instead of bulgur wheat, but I ended up adding a bunch of stuff that one does not add to that dish, for the sake of using veggies before they go bad. I'm incredibly determined to use up the massive amount of kale I have before it rots. So this is how this recipe was born!

If you have never used or heard of quinoa before, it's a remarkable little grain. It kind of looks like couscous, but it has a complete protein profile. It contains all of the amino acids necessary for our health. It's popular among the vegan/vegetarian crowd for that reason. It also is very easy to make! You make it much in the same way that you make rice or oatmeal. Use the ratio of 1 part quinoa to 2 parts liquid. I usually use water, but you can also use vegetable broth if you like. Rinse your quinoa, add it to a saucepan with the water, and cook over high heat until it absorbs all the liquid and becomes fluffy. 


Next you steam your kale. As I was saying before, I am currently trying to use as much of it as possible, and steaming it reduces it in size, so you can eat MORE! I put a large pot on the stove and filled it 3/4 o  the way full of washed and cut kale, and added about 1.5 cups of water and covered it. It took less than five minutes to cook down. 


While everything was cooking, I prepped my other veggies, made easier by my handy dandy ninja blender, which doubles as a processor! I added red onion and a few baby bella mushrooms to the blender and processed and transferred the chopped veggies to a large bowl. 


I added a few cloves of garlic to that with the garlic press, and added a few dashes of coconut aminos and stirred it all up. Aminos are a soy sauce substitute; they often have less sodium than soy sauce and add a nice flavor. (This was one of my Everything Natural purchases today!) 


After the quinoa was cooked, I added it to my chopped veggies and combined. I also added about 1/4 cup lite coconut with a squeeze of half a lemon. I added a can of cannellini beans, and chopped up a few roma tomatoes. I chopped up some mint and cilantro and added that before finally adding my finished kale and combined the ingredients. Tabbouleh traditionally also contains flat-leaf parsley, but I don't have any at the moment, so I skipped it.  After I let it chill in the refrigerator for about an hour and a half, it was ready to eat, and it was fan-freaking-tastic!  
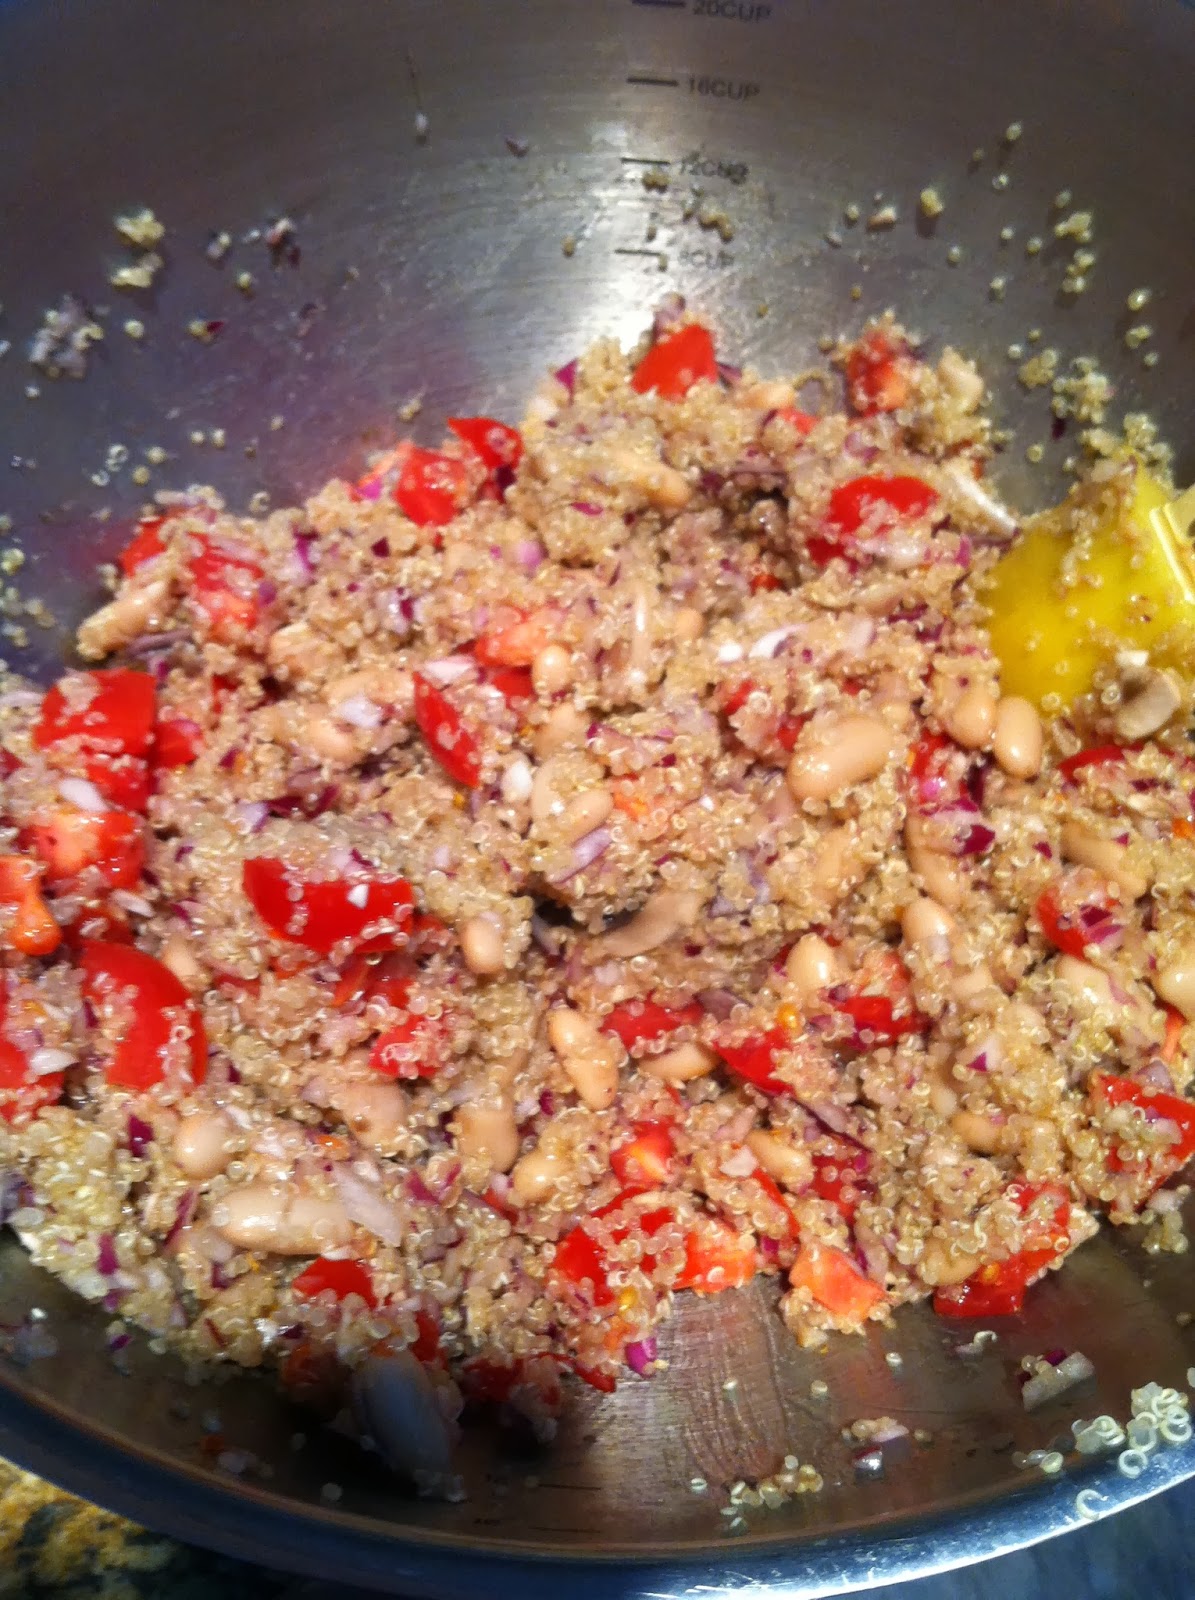

A new favorite! 

Ingredients:

1 cup uncooked quinoa 
3.5 cups water, separated
1 extra-large bunch of kale, trimmed, cleaned, and cut
1 medium red onion
2 baby bella mushrooms
2 cloves garlic, minced 
Juice of 1/2 lemon 
4 tbsp chopped mint
4 tbsp chopped cilantro
1 15.5 oz can of cannellini beans, rinsed
4 Roma tomatoes, chopped
1/2 avocado, diced 
1/4 cup lite coconut milk
1-2 tbsp liquid aminos/low sodium soy sauce
1 tbsp flax
1 tbsp chia seeds

Directions: 
  • Cook quinoa with 2 cups water
  • Steam kale (use 1.5 cups water)
  • Chop or process onion, mushroom, and herbs
  • Transfer to large bowl, add liquid aminos and combine
  • Stir in cannellini beans, minced garlic,  diced tomatoes, avocado, flax, and chia seeds. 
  • Add lemon juice and coconut milk
  • Add quinoa and combine all ingredients. 
  • Lastly, drain remaining liquid from kale, and stir it in with the rest of the salad 
Pat yourself on the back for preparing such a wholesome, healthy meal! 


Tuesday, January 28, 2014

Coconut Curry Stir Fry with lentils

Stir fry is one of the easiest ways to get your cooked veggies nice and tasty. What makes the nutritarian way of making it that much better is the lack of added oils and sugars like high fructose corn syrup and the density of nutrients and fiber that you get in every bite. The coconut milk and lentils used in this recipe is where the bulk of the calories comes from, because other than that you're just eating low calorie veggies. If you feel you need more calories or are one of those rare and exotic birds trying to gain weight, add a bunch of brown rice. I actually ate mine with some leftover spicy rice from a local Indian restaurant.

I can't take credit for this particular concoction. This is actually something that my mom, The Deb, made one night when we didn't have any great and profound dinner ideas, and it turned out to be scrumptious enough that I wanted to use it on my blog!

Warning - this is one of those types of things that we threw a little bit of this and a little bit of that in there and did it all to taste. I'll do my best to guess measurements on what was used for the sauce, but I'm not even going to try to guess the amounts on the veggies. Just cut up a bunch of veggies and eat 'em til you're full, and save some for lunch tomorrow if you have leftovers!

Ingredients:

Mushrooms
Onions
Broccoli
Green Bell Pepper
Carrots
2 cups cooked Lentils
2 cloves garlic, minced
1 cup coconut milk
3 tbsp tomato paste
2 tbsp Red curry paste


  • Chop up your veggies
    • Feel free to add or subtract vegetables based on your own preferences
  • Add onions and garlic to wok (large frying pan) first, let them cook until aromatic, then add the curry 
  • Add the rest of your veggies 
  • Add about 2 tbsp of water at a time if needed to the pan to keep everything from sticking 
  • Add the tomato paste, stir to even coat all the vegetables
  • Add coconut milk last, and lentils immediate after and stir to combine
Voila! A delicious meal in record time! 


Monday, January 27, 2014

Coconut Curry Pumpkin Soup

It's been entirely too long since I have made a post; but I need to get back on it since this blog got a shout out at a little event I went to this evening! Tonight I attended a viewing of Forks Over Knives at our local community library. It was a nice little event that my mother put together. My fabulous cousin Joan, who happens to be a nutritionist, came and introduced the documentary to a small group.Barry Kaplan, who owns the only natural foods store in our town, Everything Natural, brought some healthy snacks, and I brought one of my more simple recipes that goes over very well with most crowds, coconut curry pumpkin soup. Soup is always my go-to meal when the temperature dips as low as it has. We just can't seem to get a break from this cold! 

Anywho, this soup is delicious and easy, which is why I love it. Everyone loves easy, right?

 I often add lentils to mine after the fact to up the fiber content, but it's not absolutely necessary. 

This is what the end product looks like: 

Isn't it pretty? Here's how you do it:

Ingredients: 

1 28 oz can pumpkin puree
1 25 oz can coconut milk
1.5 yellow onions
2 cups vegetable broth
2 cloves garlic
2-4 tbsp curry powder (use more if you like spicier)
1.5 tbsp cumin
2 tbsp turmeric
2 tbsp ground ginger
pepitas (pumpkin seeds) for garnish

Directions: 

  • Chop onions and mince garlic. Add both to pan, turn the burner onto medium high heat. The onions will produce their own juices, so it's not necessary to add anything else to the pan, but if you are afraid of sticking, add a tablespoon of water at a time to prevent this.
  • When onions become translucent, after about 3-5 minutes, add the spices 
  • Let cook for another two minutes, then add vegetable broth
  • When broth begins to simmer, add can of pumpkin puree and cook for another few minutes
  • Add can of coconut milk and stir
  • Transfer mixture to blender or use an immersion blender to blend until smooth*
  • Serve hot, sprinkled with pepitas 
*My mom usually skips this step when she makes it because she wants to be able to chew on her onions. I don't know, she's weird. 

The last step is to eat your soup and let it warm you from the inside out! 

Monday, January 13, 2014

FYI - Infographic


Just something I thought I'd share :) I did not create this, but it caught my eye as something I pinned on Pinterest a while back. It's quick and handy and informative! 


Saturday, January 11, 2014

Lightened-up Vegan Pad Thai

I am a HUGE fan of Thai food. And Pad Thai is, in my opinion, an ideal dish to break into this brand of cuisine. Pad Thai is the quintessential Thai food virgins' go-to option. But the last time I was out, I had a craving for this old favorite and decided to order the vegetarian option without egg, to make it vegan. When I got it, it was delicious as ever, but I was preoccupied by the added fat that I could just taste. That's what eating the nutritarian way has done to me! I can detect even trace amounts of added fat. So since I have never made this popular dish myself, I decided to give it a shot.

Initially I wanted to make this using spaghetti squash to avoid the extra calories in grains. Unfortunately, the grocery store was actually out. Plan B was to explore my other options. In the international food section I was pleased to see that brown rice noodles exist, so I decided to go with that because at least the brown variety has more fiber than the white. This is what my final product looked like:
I obviously love fresh cilantro 

Ingredients (Makes enough pad thai for 3-4 people...4 if you have small appetites) 

8 oz brown rice noodles (or white, if that's more your speed)
2-3 cups bean sprouts (I used canned, because I couldn't find fresh anywhere)
4 green onions, white parts chopped and separated 
3-4 heads baby bok choy, coarsely chopped
4 cloves garlic, minced
1/2 cup chopped fresh cilantro
1/4 cup roasted cashews or peanuts, chopped
1/4 cup silken tofu
1/4 tsp grated fresh ginger 
1 tbsp coconut oil (or plant-based oil of your choice)
1/4 cup vegetable broth

For pad thai sauce:
1/4 cup vegetable broth
3.5 tbsp tamarind paste
3 tbsp low sodium soy sauce
1 tbsp brown sugar (more if you prefer) 
1/4 tsp red pepper 

Directions:
  • Whisk together pad thai sauce ingredients and set aside
  • Boil water. 
  • Take water off of heat and add noodles.
  •  Let them cook in the hot water for approximately 4 minutes, or until softened
  • Strain noodles and set them aside
  • Add coconut oil to wok (frying pan)
  • Add the chopped white portions of the green onion, grated ginger, and minced garlic
  • Stir for 3-4 minutes
  • Add bok choy and vegetable broth
  • Stir for another 3-4 minutes, until bok choy is softened
  • Add silken tofu and stir
  • Add noodles to the wok and toss (like you would salad) to coat the noodles
  • Slowly add in sauce, a little bit at a time, continuing to toss the noodles so that they are evenly coated
  • Fold in bean sprouts
  • Serve hot topped with remaining green onion, cilantro, and chopped nuts 
This turned out really well and was a hit! I'll be making it again. Hopefully next time I'll be able to give it a whirl with spaghetti squash. 

Friday, January 10, 2014

Stuffed Portobello Mushrooms

It's finally FRIDAY! I'm pretty jazzed about the weekend, and spending some good quality time with my family and my dog and my boyfriend and Netflix...

I've noticed on other blogs similar to mine, they have this big old introductory portion before they get to the the recipe they are sharing. I'm not planning to do that. I find that on blogs like that, I scroll through all of the text until I get to the recipe. So, because that is my preference, I don't presume that people think my life is so interesting (it's not, I promise) that they want to read all about me. This blog isn't intended to be a diary of all aspects of my life, so I'm always going to try and keep introductions short, and then get to the good stuff!

Speaking of the good stuff, here it is: Stuffed portobello mushrooms. These are pretty easy if you have a food processor or high powered blender. My food processor is pretty much the most important appliance in my life, and I got mine for $30 from Amazon. Expensive doesn't always mean better! I use mine constantly, and it has never failed me.

Ingredients:

3 portobello mushroom caps
1/2 cup raw walnuts
15.5 oz can garbanzo beans, drained
3 cloves garlic, peeled
4 cups spinach
3 tbsp nutritional yeast, divided
2 tbsp flax seed meal
1.5 cups cherry tomatoes
juice of 1/2 lemon
3 tbsp balsamic vinegar
salt and pepper to taste

Directions:

  • Preheat oven to 400°F
  • Put beans, spinach, lemon juice, garlic, 2 tbsp nutritional yeast (set aside remaining tbsp), and flax into a food processor
  • Process, adding water as needed, until you reach desired consistency. I prefer mine to kind of resemble a hummus.
  • Halve cherry tomatoes and set aside
  • Line up mushroom caps on baking sheet, drizzle with balsamic vinegar
  • Scoop filling into the mushroom caps
  • Top with halved tomatoes 
  • Sprinkle with remaining nutritional yeast
  • Bake for 20 minutes
Enjoy! 

You could  make the filling more of low-fat pesto by halving the amount of spinach used and replacing it with fresh basil leaves, and replacing the walnuts with toasted pine nuts. Both versions are really tasty! 

Wednesday, January 8, 2014

Focus T-25 Week 1 COMPLETE!

Well everyone, I am pleased to say that I got to check off the last box of the week on my Focus T-25 calendar!

And today is....dun dun dun STAT DAY! The program is supposed to start on Monday and Saturday is meant to be Stat day. They cleverly dub it "STATurday". However, I beat to my own drum and received my T25 package on a Thursday and was too impatient to wait until Monday to start. Who says you have to start a new workout regimen on a Monday anyway? I do what I want!


So the first thing I did this morning upon falling out of bed was step on the dreaded scale. I look at weight as one of many tools one can use to track progress. I began the program at 133.4 lbs. And even though I try not to worry TOO MUCH about the scale, I was still pretty disappointed in myself from nearly putting myself back where I started pre-Fuhrman back in July. However, there's nothing that can be done but to move forward and do better. So after 6 days of 25 minute workouts and following Eat to Live, my scale read 132.4 lbs this morning. I also foolishly did not take my measurements last week before I started, so I'm posting them now.

Waist: 26.5"
Thighs: 23.5"
Hips: 40"
Arms: 11"

Holy HIPS batman! Based on my measurements, that's where I would most like to slim down.

dat ass

Of course it would have been nice to lose more weight, but I'm sure that I'm getting stronger with those workouts, it's not pure cardio, and and muscle must be taken into account. All the same, progress is progress! 1 lb a week is a pretty good goal, as long as the direction I'm going is DOWN a pound rather than UP.

So how do I feel about my workouts? I feel like I struggled through this first week on some of the workouts. I feel so weak! There are times where I can't make it through the whole cycle without stopping for water or following the modifier. But I push through, because I know I'll be better the next time around for it. I really look forward to getting stronger with every workout.

Stay tuned for next week's update!

Tuesday, January 7, 2014

My internal reaction when people ask "So where do you get your protein?"

Here we go again. 

Cannellini Bean Salad


Check out this beauty! Now THIS is a cold salad that I could make myself eat this time of year, mostly because it reminds me of happier times (aka SUMMER) 

All the fiber is nice and filling, and you're getting some raw veggies in! Granted, they aren't the leafy green kind, but there are still so many healthy nutrients in the ingredients included. 

This has few ingredients, and is so easy to make. 

Ingredients:

5 vine-ripened tomatoes, diced
1.5 cucumber, diced 
2 small yellow (or orange, or green, or red) bell peppers, diced 
3 cups cannellini beans, canned or dried 
1/3 cup Creamy Cashew Dressing
salt and pepper to taste

Directions:


  • Combine all ingredients except dressing
  • Pour dressing over top and toss to evenly coat the veggies and beans! 
  • SO EASY! 

Monday, January 6, 2014

Maple Balsamic Brussel Sprouts


It's a struggle to get me to eat cold veggies on a night like tonight. It's going to be dipping below zero here in PA, with the wind chill between 25 and 35 below zero...Ugh.
Winter is one long ride on the struggle bus 


 It's only natural to crave warm food is it not? So I pulled this recipe from my vegan Thanksgiving dishes collection because it was one of my favorites and I had the necessary ingredients. At Thanksgiving, I served it as a side, but this time around I had a heaping plate of brussel sprouts topped with some great northern beans. My boyfriend is going to just looooove being in my company later this evening ;)


Sorry, that's not making anyone want to try this recipe. This dish was easily the favorite among all my omnivore family members, so why not give it a shot? Serve it as a side dish so you're not as smelly as I'll be later!

Ingredients:

2 lbs brussel sprouts, trimmed and washed
1.5 tbsp coconut oil
1 tbsp turmeric*
1/2 tsp red pepper flakes
pinch of salt

For the dressing:
1 tbsp pure maple syrup
3 tbsp balsamic vinegar
2 tbsp dijon mustard (I used Grey Poupon)

*The turmeric is optional because it doesn't really change the flavor much; I just happen to use the spice as often as possible. Supposedly it's great for your skin and anti-inflammatory among other things, and it adds a little color, so I use it liberally and often.

Directions:
  • Heat coconut oil in large frying pan on medium heat
  • Using the slicing attachment to your food processor, shred brussel sprouts
  • Transfer the shredded sprouts to the pan, and stir to coat them in the coconut oil
  • In a separate bowl, whisk together the balsamic vinegar, the syrup, and the mustard. 
  • Continue to stir brussel sprouts often. They will begin to cook down slightly 
  • After the brussel sprouts start to become slightly browned, add the dressing and mix thoroughly 
  • Add turmeric, salt and pepper
  • Stir to combine 
  • Serve warm 

Final product looks like this: 
My meal in particular looked like this: 
Topped with great northern beans and a side salad of tomatoes and red onion with a sprinkle of salt, pepper, and a few splashes of white balsamic vinegar. 

Product Review - Yonanas


Yonanas is a phenomenal contraption that my cousin gave our family as a gift for Christmas last year, and my roommates and I use it all the time. All you have to do to create a deliciously healthy and 100% guilt-free frozen treat that has the same texture of ice cream is freeze your bananas, and stick 'em through the chute! I like to add frozen berries or mangoes or kiwi or really ANY kind of fruit to switch it up - it creates the same kind of creamy texture as long as bananas are your base!

Even my dad, a self-proclaimed ice cream monster, will willingly go for Yonanas instead of the grocery-store ice cream that's full of added sugar and fat. His go-to dessert is plain banana with some Hershey's syrup and walnuts sprinkled on top.

My biggest qualm with this product is that it's not an easy clean up. You also need to take the whole thing apart and use a spatula to get the rest of the fruity goodness out; a LOT of the end product ends up stuck inside. Dole now has an "elite" version of this product on the website for more than twice the price of the original, and I wonder if they have hampered those issues in that one. For now, I'm satisfied with what I have.

I give this product a B+. It doesn't get a perfect score because if I am only making the treat for myself, I feel like it's not worth the effort of clean up.

Creamy Cashew Dressing

This dressing is meant to mimic Caesar dressing, but it tastes more nutty than traditional Caesar to me, so I have decided to call it Creamy Cashew Dressing! The creaminess that the cashews add to the dressing is what I love most about it; you don't have to feel guilty because it's right in line with Dr. Fuhrman's Eat to Live guidelines, even the strict phase. According to Dr. Joel Fuhrman, adding a little fat from nuts and seeds to your meal allows better absorption of the nutrients in your veggies and fruit.

You're probably like, HEY MAURA! Why can't I just buy vegan dressing at Whole Foods? Well dear reader, of course you can do that! However, keep in mind to pay attention to labels. If you are trying to follow the nutritarion/Eat to Live lifestyle which frowns upon added oils, be mindful that most store bought dressings contain a lot them. You may also have a higher sodium content in the store-bought version than the homemade kind, which is usually the case.


Ingredients:

3/4 cup raw cashews

3/4 cup water (or more, depending on how thick or runny you want your dressing)

4 tablespoons lime (or lemon) juice

1 dried (and pitted) Medjool date

5-6 cloves garlic

1/4 cup nutritional yeast*(optional)

1/4 tsp onion powder

1/4 tsp red (cayenne) pepper

salt and pepper to taste

Directions:


  • Preheat oven to 375°F
  • Put garlic cloves on pan (take cloves off the bulb, but do not unwrap them entirely)
  • I tend to do it like this, and use the rest of the roasted garlic in another recipe 

Picture from www.ecurry.com


  • Let them roast in oven for up to 25 minutes
  • Soak raw cashews in water for approximately 10 minutes to soften them up. This will make them easier to blend. I let them soak while I am waiting for the garlic to roast.
  • When garlic is roasted, add 2 tbsp of roasted garlic to blender or food processor.
  • Add all other ingredients
  • Process/blend, adding water until you reach the desired consistency
  • Serve over your huge salad and pat yourself on the back for being awesome!


*For those not familiar with nutritional yeast, it can be found in health food stores or in the health food section of stores. Here in NEPA we have Wegman's (all hail) and they have a great heath food section where you can get ingredients such as nutritional yeast in bulk. It's about $10/lb of it, and a pound of this stuff is a LOT. It's a good value.

- In the recipe, Feel free to add LESS nutritional yeast than me. I always add more than other recipes call for, because I happen to love love love the cheesy flavor and thicker consistency it yields. I've heard that some people find the flavor weird. You can also omit nutritional yeast entirely if you like, it will still taste yummy. If you decide to use it, it IS a good source of B vitamins and amino acids!

Sunday, January 5, 2014

Berry Green Breakfast Smoothie


Have you ever put spinach in a smoothie? I do it literally every time I make one. It tends to make the drink look like swamp sludge and prompts some disgusted faces from my roommates.


But here's a little secret: I kind of hate eating your typical salad. I hate eating big pieces of leaf. I love a lot of vegetables, but raw spinach and raw kale aren't up high on my list of delectables. So, I sneak it into my breakfast smoothie to make sure I reach my 1 lb of raw veggies, focusing on the green kind. In a smoothie, the fruit negates the taste of the greens and you barely notice them! It's like magic!


I mentioned this staple smoothie of mine in an earlier post, and decided when I made one this morning that I might as well take a picture and post it. It's quite simple with basic ingredients. Usually my smoothies look more green or brown than they are in the picture, but we were a little low on spinach so I didn't add as much as I typically do. This smoothie did not receive the Clint Eastwood face from my mother.


Ingredients:

1 cup frozen berries

1 med banana

1.5-2 cups spinach

1 tbsp flax seed meal

1 cup unsweetened almond milk

Directions: Add all ingredients to your blender and blend until smooth.

So simple! So delicious! It's a breakfast (or any time of the day) win!


Saturday, January 4, 2014

Mock Tuna Salad Sandwich


This is another very versatile recipe. Tuna salad has always been a favorite of mine, and missing out on my tuna salad sandwiches made me feel like this:


So I threw this bad boy together. I make pretty large batches of stuff because Deb will undoubtedly get into it, and I simply love leftovers so that's really all there is to that. Also you can definitely mix up your spices in this. When I'm on an Indian food kick I'll add turmeric, ginger, curry, tamarind paste, or any number of spice combos to give it a new spin.


Ingredients:

2 cans of chickpeas (garbanzo beans)

1/2 medium red onion

1/3 avocado

2.5 tbsp Vegenaise

1 tsp dill

1 tsp ground mustard

splash of rice vinegar

salt and pepper to taste 

Directions:
  • Put chickpeas, avocado, and onion into food processor and process until everything is combined 
  • Transfer to bowl and add Vegenaise 
  • Add splash of vinegar
  • Add spices
  • Mix together
Final product will look something like this:

                      
Voila!


I prefer to serve this on an open face slice of whole grain bread with sliced tomato and baby kale. But this can be served on top of salad or as a side dish. Yesterday I had it like a regular sandwich because I felt like I needed the bread to fill me up. My Focus T25 workouts have been kicking my butt and I'm feeling hungrier than usual!

Friday, January 3, 2014

Focus T-25


Hi there!

If you have taken the time to suffer through my About Me page, you'll know that beginning this blog is a way for me to stay accountable to making positive healthy changes. Well, I bought myself a Christmas present, and it was Focus T-25, a workout regimen created by Shaun T (the creator of Insanity). Please note that Beachbody does not pay me to plug their product, and neither does Dr. Joel Fuhrman for that matter. Any opinions that I give are 100% unbiased and purely how I, an average consumer, feel about it the product. There ain't none of this:


I have a LOT of exercise DVDs. A whole library, really. I have Brazilian Butt Lift, Insanity, P90x, The Firm, various Jillian Michaels workouts, Jackie Warner workouts, Zumba, and others. My mom and I often do them together, especially because it's WAY too cold to go for our long walks. So, I decided to try give this one a try, because a 25 minute workout appeals to me:


Focus T-25 is a 5 day a week, 5 week program, totaling 25 workouts. It comes with an alpha cycle, and a beta cycle. Each are 25 days of workouts. The big selling point is that you are supposed to get the same results with this program doing 25 minute workouts as you would doing hour long workouts. It's pretty hard to make excuses for skipping workouts if it's only 25 minutes long. But how hard can a 25 minute workout really be?


Well, I completed workout number 1 (aptly entitled "Cardio") in the Alpha cycle last night, and I can tell you that I was challenged. Granted, I haven't done cardio in weeks, and I'm feeling generally soft everywhere, but it was difficult enough that I needed to take my rescue inhaler. AND I did some of the modified, lower impact movements, which was kind of embarrassing. I guess no more embarrassing than needing my inhaler after the workout. Sometimes I felt a little like this:


But at least it wasn't dance-y, because I could never follow something like this:


Even though I was a little disappointed that I was riding the struggle bus for all 25 minutes, I finished and I got a damn good workout in only 25 minutes, which is what it advertises! And we all start somewhere; it's all about improvement, right? I'll be post my progress as I go and we'll see if T-25 delivers!

Indian Lentil Chili


Happy snow day from northeast PA!

This may or may not look particularly appetizing to some, but I promise it is so delicious. It's easily my favorite dish to make, and my family, 3 of whom are omnivores, also really enjoy it. I often serve it over steamed kale, but it can definitely stand alone, as I am eating it here for breakfast. Yeah, I'll eat all kinds of things for breakfast, I don't really believe in things being "breakfast" foods or "lunch" foods...it's all food to me. So here's how you can make my yummy chili, and it yields about 8 servings in a small bowl like I have shown:

Ingredients:

1 large onion chopped (I used red this time around, but I usually use yellow. Equally tasty)

4 cloves garlic, minced

6-8 whole baby bella mushrooms, or about 2 cups chopped

3 cups cooked green lentils

1- 20 oz can crushed tomatoes

1/2 cup water

2 tbsp turmeric

1 tbsp curry powder

2 tbsp Patak's spicy garlic tandoori paste*

1/2 tsp red pepper flakes (or more, if you want it spicier)

*This can be omitted; just make sure to add 2 tsp cumin and 1 tbsp ginger powder if you don't use it

Directions:
  • Cook 1.5 cups dried lentils to yield about 3 cups of cooked lentils. 
  • Cook by boiling 1.5 cups in 3-3.5 cups of water and cook until soft (about 25-30 minutes) 
  • Set lentils aside 
  • Add chopped onion and minced garlic to large wok/stir fry pan on medium - high heat 
  • Use water to keep onions from sticking to pan
  • As onion and garlic become translucent, add spices and stir periodically 
  • Add chopped mushrooms, cook for another 4-5 minutes 
  • Add Patak's spicy garlic tandoori paste* Which can be found in the international food section of the grocery store 
  • Add lentils to the mixture and stir
  • Add crushed tomatoes and mix it all together

Done-zo! This is a one pot meal of sorts, you get veggies, and legumes, and if you choose, you can add steamed greens and serve the lentil chili over top. My mom has been known to make herself a big salad, and top it with the chili to use as her dressing. It's quite versatile. Enjoy!


Thursday, January 2, 2014

Day 1 Continued ...

We are having quite the snow storm here in the northeast, so I left work as the snow began and shuffled my way to the grocery store to get a few things I needed to make a vegetarian chili of sorts. The main ingredient in this meatless treasure? Lentils!

I have been having a love affair with lentils since this summer when I decided to cut meat out of my diet. They are by and large my favorite legume. They are easy to cook, and they are high in protein and iron. They also have lots of fiber, which is key to keeping me from getting too hungry between meals. I have heard them called one of THE most important foods to incorporate into your diet.

Dr. Fuhrman encourages frequent consumption of  mushrooms and onions, of which this dish has plenty. I will post the recipe with a picture in the morning; I'm done eating for the night and forgot to take a nice picture after I completed my masterpiece.

January 2 - Day 1 of my 6 week strict nutritarian challenge!

HELLOOOOOO!!!!


Me...trying to take a nice picture, and my sister....successfully ruining my nice picture. She's a gem.

I don't know if y'all know this, but it's 2014 bitches. Time to turn over some new leaves and make positive changes! My younger brother is getting married in 6 months, and I plan to look like a fitness guru by the time that happens.


I want people to ask me what I'm doing to look so wonderful and I want to tell them that I added muscle to my frame and slimmed down with a VEGAN lifestyle. Notice that I say "lifestyle" rather than "diet". Because for me, that's what this truly must be.

Take a look at my “About Me” section if you feel like reading my long-winded “how I got here” story. Be warned: I’m something of a rambler. It’s only 1PM, but so far, so good! Breakfast was a smoothie that I typically make:

1 ripe banana
1 cup frozen berries
1 cup unsweetened vanilla almond milk
2 cups baby kale

Delish!

Since I have a desk job and getting enough activity throughout the day is a challenge, I’m making an effort to drink more water, which makes me have to pee, which makes me get up and walk to the bathroom. After I pee, I do 40 air squats in the stall. Call me crazy, but it’s a nice little activity boost that wakes me up. I’m a believer that even a little bit of activity here and there is better than none all. Even if it looks like this:


That’s all for now! Happy New Year, and back to the grind!