Friday, January 31, 2014

Quinoa/Kale Salad


It's only 1:39 and I have had such a productive day! I got a new job (yay!), and start Monday. So I have today to take a bit of a breather, and did some food shopping at Everything Natural as well as the regular grocery store. I've made a beautiful lunch, and have a lovely dinner planned! First things, first, this is what you can toss together if you have about 30-40 minutes on your hands! 

I've decided that I need to take photos of the process rather than just the end product. This particular salad is inspired by tabbouleh. It began as version of the Arabic dish using quinoa instead of bulgur wheat, but I ended up adding a bunch of stuff that one does not add to that dish, for the sake of using veggies before they go bad. I'm incredibly determined to use up the massive amount of kale I have before it rots. So this is how this recipe was born!

If you have never used or heard of quinoa before, it's a remarkable little grain. It kind of looks like couscous, but it has a complete protein profile. It contains all of the amino acids necessary for our health. It's popular among the vegan/vegetarian crowd for that reason. It also is very easy to make! You make it much in the same way that you make rice or oatmeal. Use the ratio of 1 part quinoa to 2 parts liquid. I usually use water, but you can also use vegetable broth if you like. Rinse your quinoa, add it to a saucepan with the water, and cook over high heat until it absorbs all the liquid and becomes fluffy. 


Next you steam your kale. As I was saying before, I am currently trying to use as much of it as possible, and steaming it reduces it in size, so you can eat MORE! I put a large pot on the stove and filled it 3/4 o  the way full of washed and cut kale, and added about 1.5 cups of water and covered it. It took less than five minutes to cook down. 


While everything was cooking, I prepped my other veggies, made easier by my handy dandy ninja blender, which doubles as a processor! I added red onion and a few baby bella mushrooms to the blender and processed and transferred the chopped veggies to a large bowl. 


I added a few cloves of garlic to that with the garlic press, and added a few dashes of coconut aminos and stirred it all up. Aminos are a soy sauce substitute; they often have less sodium than soy sauce and add a nice flavor. (This was one of my Everything Natural purchases today!) 


After the quinoa was cooked, I added it to my chopped veggies and combined. I also added about 1/4 cup lite coconut with a squeeze of half a lemon. I added a can of cannellini beans, and chopped up a few roma tomatoes. I chopped up some mint and cilantro and added that before finally adding my finished kale and combined the ingredients. Tabbouleh traditionally also contains flat-leaf parsley, but I don't have any at the moment, so I skipped it.  After I let it chill in the refrigerator for about an hour and a half, it was ready to eat, and it was fan-freaking-tastic!  
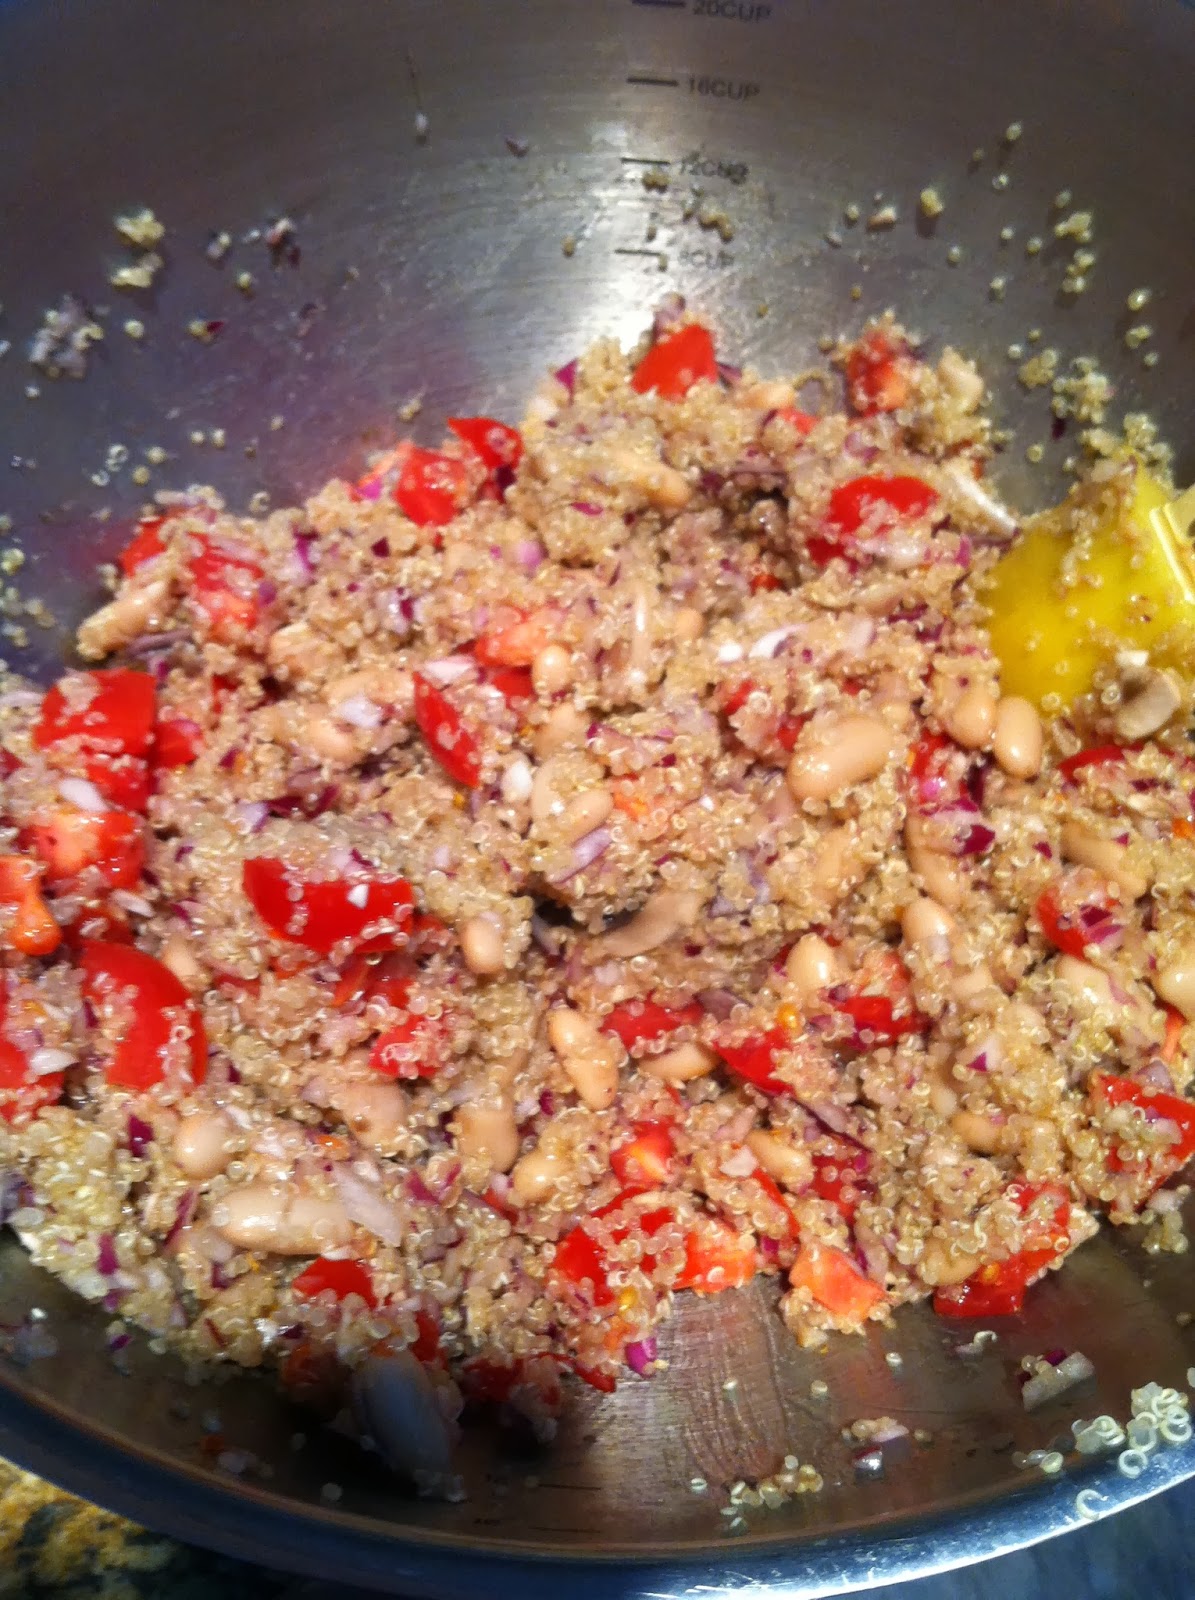

A new favorite! 

Ingredients:

1 cup uncooked quinoa 
3.5 cups water, separated
1 extra-large bunch of kale, trimmed, cleaned, and cut
1 medium red onion
2 baby bella mushrooms
2 cloves garlic, minced 
Juice of 1/2 lemon 
4 tbsp chopped mint
4 tbsp chopped cilantro
1 15.5 oz can of cannellini beans, rinsed
4 Roma tomatoes, chopped
1/2 avocado, diced 
1/4 cup lite coconut milk
1-2 tbsp liquid aminos/low sodium soy sauce
1 tbsp flax
1 tbsp chia seeds

Directions: 
  • Cook quinoa with 2 cups water
  • Steam kale (use 1.5 cups water)
  • Chop or process onion, mushroom, and herbs
  • Transfer to large bowl, add liquid aminos and combine
  • Stir in cannellini beans, minced garlic,  diced tomatoes, avocado, flax, and chia seeds. 
  • Add lemon juice and coconut milk
  • Add quinoa and combine all ingredients. 
  • Lastly, drain remaining liquid from kale, and stir it in with the rest of the salad 
Pat yourself on the back for preparing such a wholesome, healthy meal! 


Tuesday, January 28, 2014

Coconut Curry Stir Fry with lentils

Stir fry is one of the easiest ways to get your cooked veggies nice and tasty. What makes the nutritarian way of making it that much better is the lack of added oils and sugars like high fructose corn syrup and the density of nutrients and fiber that you get in every bite. The coconut milk and lentils used in this recipe is where the bulk of the calories comes from, because other than that you're just eating low calorie veggies. If you feel you need more calories or are one of those rare and exotic birds trying to gain weight, add a bunch of brown rice. I actually ate mine with some leftover spicy rice from a local Indian restaurant.

I can't take credit for this particular concoction. This is actually something that my mom, The Deb, made one night when we didn't have any great and profound dinner ideas, and it turned out to be scrumptious enough that I wanted to use it on my blog!

Warning - this is one of those types of things that we threw a little bit of this and a little bit of that in there and did it all to taste. I'll do my best to guess measurements on what was used for the sauce, but I'm not even going to try to guess the amounts on the veggies. Just cut up a bunch of veggies and eat 'em til you're full, and save some for lunch tomorrow if you have leftovers!

Ingredients:

Mushrooms
Onions
Broccoli
Green Bell Pepper
Carrots
2 cups cooked Lentils
2 cloves garlic, minced
1 cup coconut milk
3 tbsp tomato paste
2 tbsp Red curry paste


  • Chop up your veggies
    • Feel free to add or subtract vegetables based on your own preferences
  • Add onions and garlic to wok (large frying pan) first, let them cook until aromatic, then add the curry 
  • Add the rest of your veggies 
  • Add about 2 tbsp of water at a time if needed to the pan to keep everything from sticking 
  • Add the tomato paste, stir to even coat all the vegetables
  • Add coconut milk last, and lentils immediate after and stir to combine
Voila! A delicious meal in record time! 


Monday, January 27, 2014

Coconut Curry Pumpkin Soup

It's been entirely too long since I have made a post; but I need to get back on it since this blog got a shout out at a little event I went to this evening! Tonight I attended a viewing of Forks Over Knives at our local community library. It was a nice little event that my mother put together. My fabulous cousin Joan, who happens to be a nutritionist, came and introduced the documentary to a small group.Barry Kaplan, who owns the only natural foods store in our town, Everything Natural, brought some healthy snacks, and I brought one of my more simple recipes that goes over very well with most crowds, coconut curry pumpkin soup. Soup is always my go-to meal when the temperature dips as low as it has. We just can't seem to get a break from this cold! 

Anywho, this soup is delicious and easy, which is why I love it. Everyone loves easy, right?

 I often add lentils to mine after the fact to up the fiber content, but it's not absolutely necessary. 

This is what the end product looks like: 

Isn't it pretty? Here's how you do it:

Ingredients: 

1 28 oz can pumpkin puree
1 25 oz can coconut milk
1.5 yellow onions
2 cups vegetable broth
2 cloves garlic
2-4 tbsp curry powder (use more if you like spicier)
1.5 tbsp cumin
2 tbsp turmeric
2 tbsp ground ginger
pepitas (pumpkin seeds) for garnish

Directions: 

  • Chop onions and mince garlic. Add both to pan, turn the burner onto medium high heat. The onions will produce their own juices, so it's not necessary to add anything else to the pan, but if you are afraid of sticking, add a tablespoon of water at a time to prevent this.
  • When onions become translucent, after about 3-5 minutes, add the spices 
  • Let cook for another two minutes, then add vegetable broth
  • When broth begins to simmer, add can of pumpkin puree and cook for another few minutes
  • Add can of coconut milk and stir
  • Transfer mixture to blender or use an immersion blender to blend until smooth*
  • Serve hot, sprinkled with pepitas 
*My mom usually skips this step when she makes it because she wants to be able to chew on her onions. I don't know, she's weird. 

The last step is to eat your soup and let it warm you from the inside out! 

Monday, January 13, 2014

FYI - Infographic


Just something I thought I'd share :) I did not create this, but it caught my eye as something I pinned on Pinterest a while back. It's quick and handy and informative! 


Saturday, January 11, 2014

Lightened-up Vegan Pad Thai

I am a HUGE fan of Thai food. And Pad Thai is, in my opinion, an ideal dish to break into this brand of cuisine. Pad Thai is the quintessential Thai food virgins' go-to option. But the last time I was out, I had a craving for this old favorite and decided to order the vegetarian option without egg, to make it vegan. When I got it, it was delicious as ever, but I was preoccupied by the added fat that I could just taste. That's what eating the nutritarian way has done to me! I can detect even trace amounts of added fat. So since I have never made this popular dish myself, I decided to give it a shot.

Initially I wanted to make this using spaghetti squash to avoid the extra calories in grains. Unfortunately, the grocery store was actually out. Plan B was to explore my other options. In the international food section I was pleased to see that brown rice noodles exist, so I decided to go with that because at least the brown variety has more fiber than the white. This is what my final product looked like:
I obviously love fresh cilantro 

Ingredients (Makes enough pad thai for 3-4 people...4 if you have small appetites) 

8 oz brown rice noodles (or white, if that's more your speed)
2-3 cups bean sprouts (I used canned, because I couldn't find fresh anywhere)
4 green onions, white parts chopped and separated 
3-4 heads baby bok choy, coarsely chopped
4 cloves garlic, minced
1/2 cup chopped fresh cilantro
1/4 cup roasted cashews or peanuts, chopped
1/4 cup silken tofu
1/4 tsp grated fresh ginger 
1 tbsp coconut oil (or plant-based oil of your choice)
1/4 cup vegetable broth

For pad thai sauce:
1/4 cup vegetable broth
3.5 tbsp tamarind paste
3 tbsp low sodium soy sauce
1 tbsp brown sugar (more if you prefer) 
1/4 tsp red pepper 

Directions:
  • Whisk together pad thai sauce ingredients and set aside
  • Boil water. 
  • Take water off of heat and add noodles.
  •  Let them cook in the hot water for approximately 4 minutes, or until softened
  • Strain noodles and set them aside
  • Add coconut oil to wok (frying pan)
  • Add the chopped white portions of the green onion, grated ginger, and minced garlic
  • Stir for 3-4 minutes
  • Add bok choy and vegetable broth
  • Stir for another 3-4 minutes, until bok choy is softened
  • Add silken tofu and stir
  • Add noodles to the wok and toss (like you would salad) to coat the noodles
  • Slowly add in sauce, a little bit at a time, continuing to toss the noodles so that they are evenly coated
  • Fold in bean sprouts
  • Serve hot topped with remaining green onion, cilantro, and chopped nuts 
This turned out really well and was a hit! I'll be making it again. Hopefully next time I'll be able to give it a whirl with spaghetti squash. 

Friday, January 10, 2014

Stuffed Portobello Mushrooms

It's finally FRIDAY! I'm pretty jazzed about the weekend, and spending some good quality time with my family and my dog and my boyfriend and Netflix...

I've noticed on other blogs similar to mine, they have this big old introductory portion before they get to the the recipe they are sharing. I'm not planning to do that. I find that on blogs like that, I scroll through all of the text until I get to the recipe. So, because that is my preference, I don't presume that people think my life is so interesting (it's not, I promise) that they want to read all about me. This blog isn't intended to be a diary of all aspects of my life, so I'm always going to try and keep introductions short, and then get to the good stuff!

Speaking of the good stuff, here it is: Stuffed portobello mushrooms. These are pretty easy if you have a food processor or high powered blender. My food processor is pretty much the most important appliance in my life, and I got mine for $30 from Amazon. Expensive doesn't always mean better! I use mine constantly, and it has never failed me.

Ingredients:

3 portobello mushroom caps
1/2 cup raw walnuts
15.5 oz can garbanzo beans, drained
3 cloves garlic, peeled
4 cups spinach
3 tbsp nutritional yeast, divided
2 tbsp flax seed meal
1.5 cups cherry tomatoes
juice of 1/2 lemon
3 tbsp balsamic vinegar
salt and pepper to taste

Directions:

  • Preheat oven to 400°F
  • Put beans, spinach, lemon juice, garlic, 2 tbsp nutritional yeast (set aside remaining tbsp), and flax into a food processor
  • Process, adding water as needed, until you reach desired consistency. I prefer mine to kind of resemble a hummus.
  • Halve cherry tomatoes and set aside
  • Line up mushroom caps on baking sheet, drizzle with balsamic vinegar
  • Scoop filling into the mushroom caps
  • Top with halved tomatoes 
  • Sprinkle with remaining nutritional yeast
  • Bake for 20 minutes
Enjoy! 

You could  make the filling more of low-fat pesto by halving the amount of spinach used and replacing it with fresh basil leaves, and replacing the walnuts with toasted pine nuts. Both versions are really tasty! 

Wednesday, January 8, 2014

Focus T-25 Week 1 COMPLETE!

Well everyone, I am pleased to say that I got to check off the last box of the week on my Focus T-25 calendar!

And today is....dun dun dun STAT DAY! The program is supposed to start on Monday and Saturday is meant to be Stat day. They cleverly dub it "STATurday". However, I beat to my own drum and received my T25 package on a Thursday and was too impatient to wait until Monday to start. Who says you have to start a new workout regimen on a Monday anyway? I do what I want!


So the first thing I did this morning upon falling out of bed was step on the dreaded scale. I look at weight as one of many tools one can use to track progress. I began the program at 133.4 lbs. And even though I try not to worry TOO MUCH about the scale, I was still pretty disappointed in myself from nearly putting myself back where I started pre-Fuhrman back in July. However, there's nothing that can be done but to move forward and do better. So after 6 days of 25 minute workouts and following Eat to Live, my scale read 132.4 lbs this morning. I also foolishly did not take my measurements last week before I started, so I'm posting them now.

Waist: 26.5"
Thighs: 23.5"
Hips: 40"
Arms: 11"

Holy HIPS batman! Based on my measurements, that's where I would most like to slim down.

dat ass

Of course it would have been nice to lose more weight, but I'm sure that I'm getting stronger with those workouts, it's not pure cardio, and and muscle must be taken into account. All the same, progress is progress! 1 lb a week is a pretty good goal, as long as the direction I'm going is DOWN a pound rather than UP.

So how do I feel about my workouts? I feel like I struggled through this first week on some of the workouts. I feel so weak! There are times where I can't make it through the whole cycle without stopping for water or following the modifier. But I push through, because I know I'll be better the next time around for it. I really look forward to getting stronger with every workout.

Stay tuned for next week's update!